Watch as i try to completely rebuild a 1973 BMW 2002 without my neighbors finding out.

Wednesday, March 28, 2007

Score...

I love when disgruntled wifes sell off their husbands tool collections...
$35:
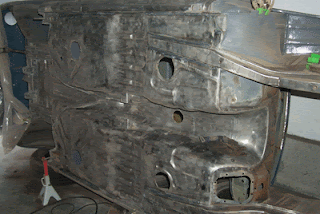
I got some other smaller stuff as well.


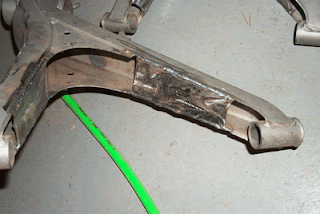
I finished up the trailing arms' modifications. I boxed them out to add strength. I did not fully box them as I dont want to give moisture a place to hide.

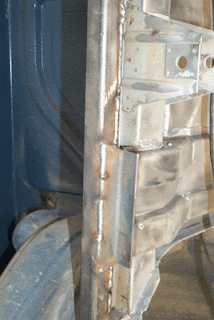
I also began to delete the opening from the heater box. 24 guage steel welded flush to the body. Im going to smooth down the welds and eventually use body filler to make it perfect.
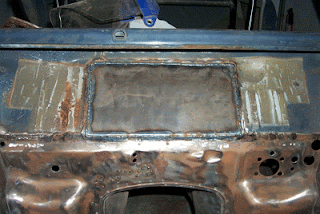
Sunday, March 25, 2007

Roll Cage for sale

What a disappointment. Finally got the cage pretty much in place, and it fits like a whores panties on monday morning. Nothing lines up. The bars dont follow the body lines at all. Huge gaps between the bars and the body. Complete junk. Im considering chopping out the whole front section and just using the rear rollbar. I had originally planned on just running a rollbar, so Im not too upset about the change of plans. With the seat in there, my head and arms are way too cramped and close to the bars. Unsafe.
To get this bar to fit required straps, a jack, main support beam of the house, a vise, screwdrivers, two hammers, and a contortionist.

Notice the roof line and the A-pillar. Gag.

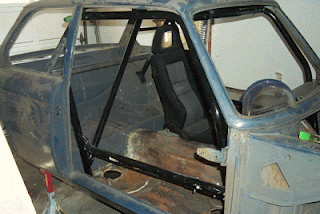
Look at the roof line. Probably blocking much of my line of vision. Especially for birdwatching.

Making room

Well, its sitting like a normal car again. Going to drill the holes for the cage(more on that in another post) and anything i need to do before the bottom is ready to paint. I cut out the front cowl. Im going to frame out the top with square stock to regain strength and to allow a nice place to mount the radiator, intercooler, oil cooler, barbie collection, etc.
Left inner fender. All the scuffed parts are where holes used to be. Weld em up, grind em down. I want the engine bay to look as simple as possible.

This is a before picture of the firewall. Hope to get working on this soon...

This is the front cowl before meeting the cutting wheel.

This is after. Look at all that wasted space. There should be enough room for at least my barbie dream house.

Beginning stages of welding up the old seems where i cut. I want it to look like it came that way from BMW. This will all be grinded smooth. There used to be a lot of holes on this inner fender as well, all of which have been filled.

Saturday, March 17, 2007

Trailing behind.

I had previously cut out the lower spring perchs on the trailing arms. This removed some of the support for the swaybar bracket. I beefed it up with some 1" angle stock.

Before:

First one done:And the other:

Wednesday, March 14, 2007

Bodies in the Trunk

I welded in some angle stock to help support the front of the trunk cage. The trunk should be strong enough to hold at least 5 bodies.


This is the area prepped and ready for the angle stock:


And this is after:

And the back side of the bracket:And this shows both brackets all done. I think Im going to leave it extended from the body like it is, in case i want to use that bracket to support something else(like brake/fuel lines):

Saturday, March 10, 2007

Melting metal

Ive been using my very amateur welding skills to begin seam welding the unit. I plan on seam welding as much of the major seams as possible. Seam welding supposedly stiffens the chassis by significant amounts(I read up to 70% somewhere, not sure if i believe Ill get anywhere close to that).


The outfit:
Early stages of welding


Earlier this week I finished the majority of undercoating removal, finally! I sandblasted the area that i plan on painting first. I left the fender linings alone because I have a set of fiberglass fender flares on their way from Cali. Much of the existing fender will be cut out to allow for wider wheels/tires.


A little more welding to do before paint, but I ran out of wire and gas simultaneously. Should be ready for paint this week, then I will be dropping it on its belly again.